Issue:
Many users would like to have Windows XP on their machine installed instead the preinstalled Windows Vista.
The problem is:
when trying to install Windows XP on a newer machine with an "SATA AHCI controller", the harddisk would not be recognized.
The reason is:
Windows XP has no SATA drivers included on the setup CD and the HDD would not be recognized from the installation wizard.
Resolution (short):
This tutorial describes step-by-step how to integrate the SATA AHCI controller driver in a Windows XP Setup CD to install XP on a machine which is equipped with an SATA AHCI controller.
By creating this special Windows XP SP2 Setup CD, it will not be necessary to load the driver from an external USB floppy disk drive during the installation procedure (by pressing "F6") which is necessary to enable SATA AHCI support for the installation wizard of the operating system.
Resolution (detailed):
1. Needed Software
- A Genuine Windows XP CD (Home/Professional) with Service Pack 2 integrated. In case of no integrated Servicepack 2 on the Windows XP Setup CD, you can integrate it with the below mentioned tool. Slipstreaming tool which integrates the drivers on the Windows XP Setup CD.
- In this tutorial the freeware tool "nLite" was used for integration of the drivers (http://www.nliteos.com/)
- Driverfiles which are needed for the integration: "IAAHCI.INF", "IAAHCI.CAT", "IASTOR.INF", "IASTOR.CAT", "IASTOR.SYS", and "TXTSETUP.OEM" You can either download the driver package from HERE (for FLOPPY click HERE) or from the Toshiba Driver Download Site (http://eu.computers.toshiba-europe.com/cgi-bin/ToshibaCSG/download_drivers_bios.jsp) or from the Intel website (http://www.intel.com/support/chipsets/imsm/). CD-Recording software to write the generated image to a CD/DVD (e.g. "Ahead Nero")
2. Downloading and unpacking the driverfiles
Attention: The filenames in this tutorial are for a system with an "ICH8M SATA AHCI controller" and must not match the drivers and chipset of your system.
Step1:
To find out which chipset is installed in your system, right-click on "My Computer" -> left-click on "Properties" -> left-click on the tab "Hardware" -> left-click on "Device Manager" and scroll down to "IDE ATA/ATAPI controllers" -> left-click on the square to expand the tree and check which chipset is installed.
In this example an "Intel(R) 82801HEM/HBM SATA AHCI Controller" (also called "ICH8M") is installed:
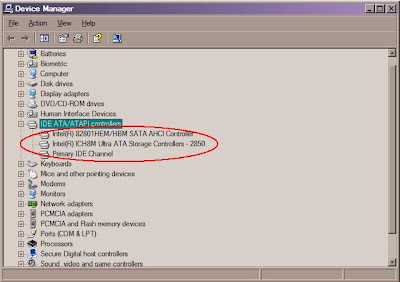
Please replace the filenames and paths from the tutorial with your drivers which match the chipset in your system. (For example: If you have an "ICH7M" chipset, use the "ICH7M" drivers for integration on the Windows XP SP2 setup CD)
Step 2:
Drivers from the Intel website:
In case of downloading the drivers from the Intel website you must make sure you have downloaded the appropriate driverpackage for your system!!
Attention: The filenames in this tutorial are for a system with an "ICH8M SATA AHCI controller" and must not match the drivers and chipset for your system.
Unpack the the driverfiles by running the downloaded file (i.e. IATA78_ENU.EXE) with the command line parameters -A -A PC:\
Open a commandline and type the following to extract the files:
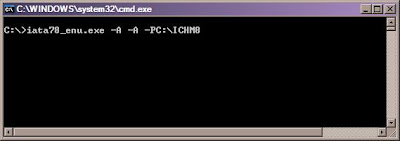
Please follow the wizard which appears after executing the command.
After the installshield has finished, the needed files are now available in the folder you have typed in the commandline:
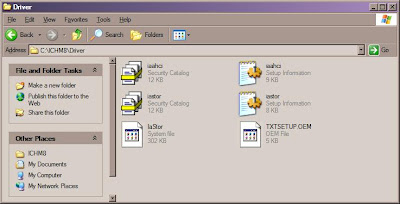
Copy these files to the newly created folder in "Step 3"
Drivers from the Toshiba Drivers Download site:
In case of downloading the drivers from the Toshiba Driver download site (http://eu.computers.toshiba-europe.com/cgi-bin/ToshibaCSG/download_drivers_bios.jsp) unpack the downloaded file to a folder on your harddisk (i.e. C:\stormng-20070827133046) Go to the folder where the files were extracted and go into the folder "F6flpy" to choose the drivers for your chipset:
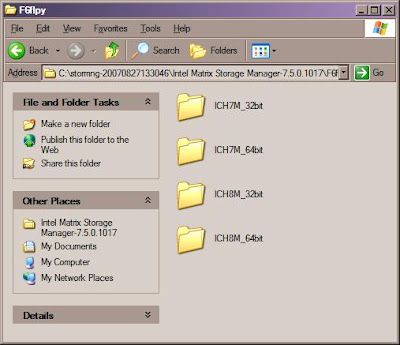
Copy the files from the chosen folder to the newly created folder in "Step 3"
Step 3
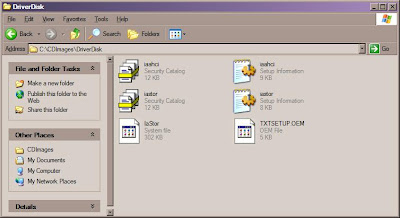
For the integration of the drivers the folder "DriverDisk" is needed. Create this folder and copy it in a folder of your choice (i.e. "C:\CDImages").
Copy the files from the downloaded driverpackage to this folder:
3. Copying the Windows XP Setup files
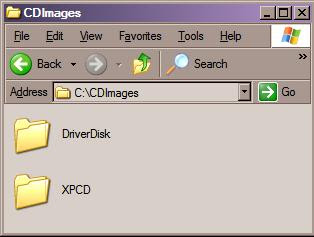
Create the folder "XPCD" in "C:\CDImages" :
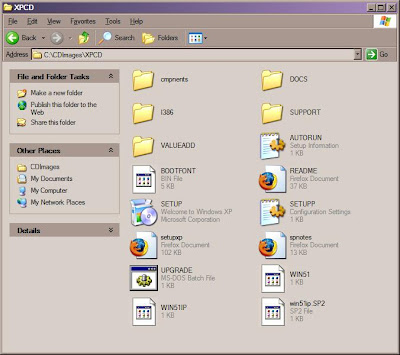
Copy all files from the Windows XP CD to the folder "C:\CDImages\XPCD"
4. Integration of the driver files (Example is given with "nLite")
In the first dialog "nLite" asks for the preferred language. Choose the language you prefer (in this example "English") and continue with "Next":

In the next dialog, "nLite" asks for the folder which contains the Windows XP setup files. Search the folder by clicking on "Browse.." and choosing the folder "XPCD".
Continue to the next screen by clicking on "Next":

In the following dialog choose the "Buttons Drivers" and "Bootable ISO". Continue by clicking on "Next":

In this dialog click on "Insert" and "Single Driver" to choose the needed drivers:

A window will open and ask for an "*.ini" file. Go to the folder where the drivers are and choose the "iaahci.ini". Click on "Open":

Choose the chipset which is installed in your system and click on "OK". If unsure which chipset is installed, go to "Step 1" of "2. Downloading and unpacking driverfiles"
In this example the drivers from the Intel website were loaded which contain all available drivers. If you choose the driver from the Toshiba website only one driver will be available which must be chosen.
In this example the previously determined "Intel(R) 82801HEM/HBM SATA AHCI Controller" (also called "ICH8M") will be chosen:

The driver is now ready to be integrated into the new Windows XP image. Click on "Next" to continue to the next step:

Please wait until "nLite" has finished the integration procedure and click on "Next":

The drivers are now integrated and the image is ready to be created. Choose "Create Image" and click on "Make ISO" to start the image creation:

The image will be created after you have chosen the destination folder and the filename. After creation the ISO file can be written on a empty CD/DVD with a burning program (e.g. "Ahead Nero"):

Now you can install WindXP on your machine without the need of an external USB floppy drive.
